SEARCH TOM'S BORING MORDHEIM BLOG

Pages

Forum

Paintservice

BTB

Tuesday, 24 March 2009

Shady business

I had some spare parts. To be exact, I had 5 Corsair cloaks, a few left over Daemonette heads, some Wood Elf parts and some more Corsair arms.

So I figured, why not make a small unit out of these?

My eye fell on a pretty useless one indeed: Dark Elf shades (only surpassed in uselessness by Shades with great weapons). But since it was all going to be made from bits, I thought, I might aswell give it a try.

So here is another WIP project that patiently waits to get painted :)

Enjoy


I did not feel like using wood elf cloaks AGAIN, since I have done so already on my Dark Riders (soon to be revealed) and my assassin. So I used Sea Dragon Cloaks... I think it was not a too bad decision after all. It looks okay I think.


I added a little bit of detail with Green Stuff. Since my Dark Elf army is winter-themed, I thought thick scarves were in place here.

A few inaccuracies in equipment: I did not have any Repeater Crossbows, that Shades should normally carry. I only had some Repeater Handbows (rule wise, the R-Crossbow's little brother)... but who cares really?

Friday, 13 March 2009

Dark Elf Harpists, nay... Harpies

All right, out with it!

Like almost every collector, I have quite a lot of unpainted miniatures (mostly conversions) and virtually no time to paint them.

So instead of hoarding pics of my unfinished projects on my hard drive, I might aswell start sharing WIP pics (with no guarantee that these projects will be completed anytime soon).

Here is a little project I have started a while ago, but, like many others, is currently on hold. For some inexplicable reason, I felt the urge to make some harpies for my tiny dark elf collection, because it sounded like a cool challenge to try and top the "original" GW models.

So I got myself a little box of the newly released Daemonettes, since I thought the models are just PERFECT to represent harpies (with a little conversion of course).

Below you will find some WIP pics of my conversion attempts!

My special thanks go to Alan Preuss, for his generosity. He provided me with A LOT of plastic dryads, which partly found their place in my wood elf army and were partly used for this project.

I hope you enjoy these few modest pics ;)

My 6 plasitc harpies... in the making.

I wanted the bases to reflect the harpie's role in combat. The massive "stone" formations should suggest that Harpies are there to overcome difficult/impassable terrain.

I also imagine them as dwelling in caves, somewhere high up on mountains (who cares what the Dark Elf Codex says, the fluff in there is abysmally unimaginative and badly written anyways :).

The bases are pieces of bark I scratched off a tree. I made sure to take it from the very bottom of the tree and to only remove loose bark to avoid wounding the tree too much. No trees were harmed in the making of these bases! :)


The wings are a bit of a challenge. I don't know if this will work, but so far I am optimistic. I cut out rough wing shapes from cardboard and attached it with a pin/hole system to the torsos.


The bodies are Chaos Daemonettes. The hands are transplanted from Wood Elf Dryads. I added some thumbs where neede as dryads often only have 4 fingers. I think they make pretty cool talons (albeit a little disproportionate).


I intend to reinforce the wings by adding green stuff detail.

[EDIT]: Here's a little tutorial on how I made the Harpie's wings.

Saturday, 7 February 2009

Six inches of enchanted wood - Part 2 of 2

This is the finished wood, ready to be set on the table!

Oh... that reminds me, I need to make a table... hmmm.

Enjoy!


Tuesday, 3 February 2009

Six inches of enchanted wood - Part 1 of 2

What is the only Warhammer army that has a piece of scenery as a "unit"?

Exactly. My beloved Wood Elves. If you take a look at p.18 in your Wood Elf Army Book (everyone owns one, right?) you will discover the Woodland Ambush rule, which allows the Wood Elf player to place a 6" wood anywhere in his half of the table after scenery has been placed and before deployment.

In other words: I get to build a small wood to carry around with my army.
I am sorry, but you can't get any cooler that that :)

The trees are from Woodland Scenics. Here you see the base which I carved out of styrofoam.

Of course any Wood Elf-specific piece of wood (especially one that magically appears before each battle and can potentially be moved around during the fight by spells) need wardstones.
Making wardstones: This is pretty easy. All you need is a lighter and a metal tool of some sort with a pointy end. Heat the tool with the flame and quickly carve the desired shape into the styrofoam. The heated tool should last for approx. 5 seconds, which is more than enough to trace a quick spiral.

Don't worry about the metal getting all black and covered in molten styrofoam. Just take a damp towel to clean the tool and melt away the styrofoam residues from the tool.

I made some roots out of green stuff (I did not go into too much detail, because of lack of time and because most of the roots will be covered with foliage later anyway).

That's it for now!

I don't have a lot of time on my hands currently to do any painting, so the Wood Elf projects will just keep piling up until they get painted. But everything will get painted eventually...

See you next time!

[EDIT]: I forgot to mention that this piece of scenery is a first step towards re-vamping my very old WHFB table into a decent "rural" setting (as opposed to "urban" Mordheim) for games of Border Town Burning, Empire in Flames and WHFB.

Tuesday, 30 December 2008

Magic girls

Hey!

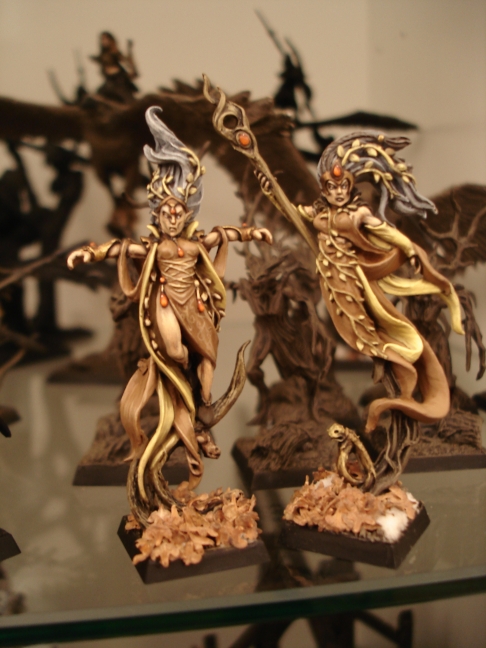
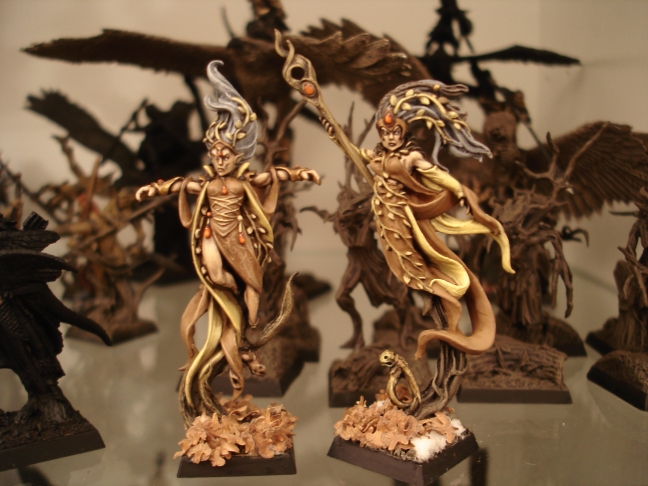
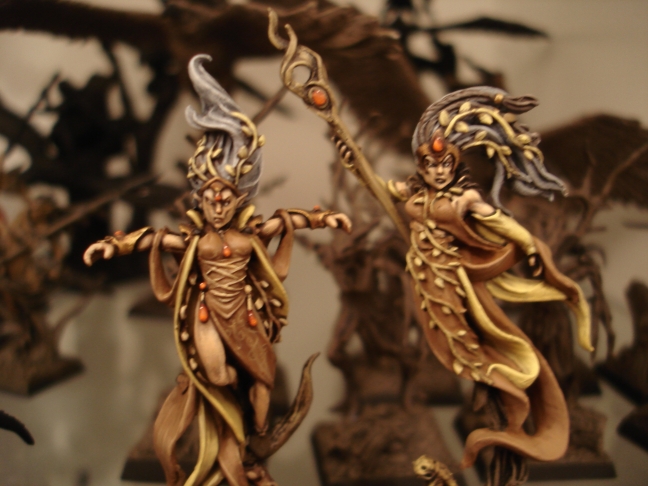
After a long silence I finally have something new to share. I had a little spare time (Christmas holidays) and got a chance to speed-paint 2 minis between wrapping presents, buying a christmas tree and doing all the (cool) celebrating.

Another quantum leap towards the goal of seeing my (dauntingly big) wood elf army finished one day.

Here are two wood elf spellweavers!
I hope you like them!


As requested here are the colours I used.
I use mainly Vallejo paints so I added the approximative GW equivalents in brackets for those of you who use GW paints. When there is no direct equivalent to the Vallejo Paint I suggested a mix of GW paints.

Key:
BeBr = Bestial Brown
BlBo = Bleached Bone
SnLe = Snakebite Leather
SuYe = Sunburst Yellow
GrEa = Graveyard Earth
ElFl = Elf Flesh
DaFl = Dark Flesh
FiOr = Fiery Orange

The Brown parts

1. Vallejo Tierra Mate (BeBr)
2. Highlight with mixes of Vallejo Tierra Mate (BeBr) with increasing amounts of Vallejo Arena Oscura (BlBo).

The Yellow Parts


1. Vallejo Uniforme Inglés (SnLe)
2. Highlight with mixes of Uniforme Inglés (SnLe) with increasing amounts of Vallejo Amarillo Arena (BlBo+SuYe).

The Skin


1. GrEa
2. Highlight with a mix 1:1 GrEa+ElFl
3. Wash with GW Devlan Mud and let dry (!)
4. Highlight again with mix from step 2, i.e. 1:1 GrEa+ElFl
5. Highlight some more with 1:2 GrEa+ElFl
6. (optional) Highlight with pure ElFl

The diamonds


1. mix 1:2 FiOr+DaFl
2. Make half-circular highlights with mixes of DaFl with increasing amounts of FiOr until you reach pure FiOr.
3. (optional) Place a pure DaFl arc oposite the pure FiOr to give some more depth.
4. Place a little dot of white on the darkest (top) part of the diamond to simulate the reflection.

I hope that helps!
Don't hesitate to ask me here or on the forum if you have any more questions.

Friday, 7 November 2008

Geschichten aus dem Wienerwald - Part 3

There he is, the finished Treeman built from scratch!
Enjoy.


Wednesday, 15 October 2008

Golden Tom results are out!

Congratulations to the winners of Tom's Boring Mordheim Competition 2008!

Golden Tom
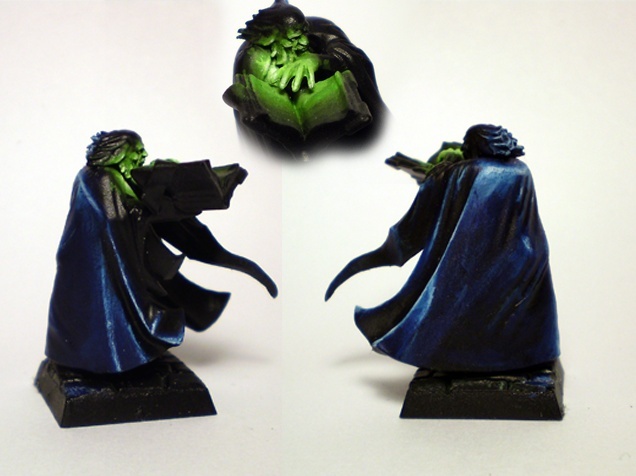
Moonlit necromancer
by footofadhesivetape


Silver Tom
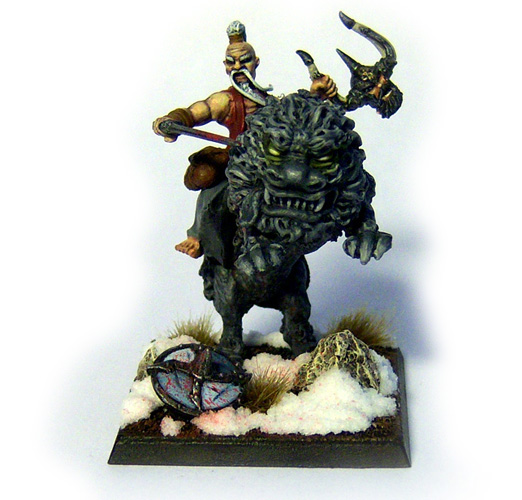
Dragon Monk on Temple Dog
(for Border Town Burning supplement)
by Cianty


Bronze Tom
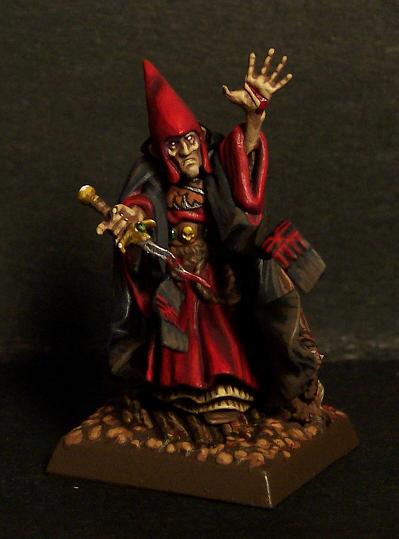
Magister casting Dark Blood by UnderBheit


Head over to TBMF for more pics of the winning entries, an overview of the jury's votes and to catch a glimpse of all the other fantastic entries!